 |
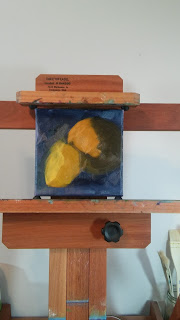
| "Orange Study #1" by Monique Chartier. 6" x 6" oil on linen. |
(P.S. I actually painted this on Christmas day. It is okay to "paint ahead.")
Step One: Set up the still life. Here, I tried to be aware of several concepts while setting up the still life, including:
- Avoid tangents
- Avoid lines moving out of the composition
- Keep an uneven distribution of dark to light values (this painting is "low key," or dark value dominant)
- Locate the "focal point" and plan to emphasize it using color, tone, and lines
Step Two: Tone the canvas. I like to work with a canvas toned with color and wiped with turpentine on a paper towel. This cuts the white on the canvas. It also allows me to "draw" and lift the lights of my subject with a brush dipped in turpentine when I draw my subject in Step Four. I only use turpentine at his stage because the smell is so strong, but I prefer it to odorless mineral spirits (OMS) at this stage because it dries a bit faster. While I'm painting, I clean my brushes with OMS.
I toned my canvas here with a muted transparent purple mixture of Ultramarine Blue, Viridian Green, and Alizarin Permanent. I chose a purple because it is the opposite or complimentary color of the lightest hue in my arrangement, which is yellow. When painting alla prima (wet-into-wet), some of the toned color will peek through in the brush strokes, and a complimentary color adds interest. Although my still life box is black, I planned to make the background more blue for interest and because it is the complimentary color of the main orange subject.
Step Three: Create a value drawing. I planned the subject using my tiny sketchpad and dark pencil. This helps me decide where the lightest lights and darkest darks are, and it helps me decide where exactly on the canvas the drawing should go, including whether to crop edges of the subject.
Step Four: Draw the subject on the canvas. I "draw" using a brush dipped in turpentine to lift the lightest areas while I draw with paint thinned with turpentine. Usually I use my value drawing as a reference, rather than referring to the still life set up.
Step Five: Block in the subject. Focusing on the main shapes and lights and darks, I blocked in my main subject.
Step Six: Add detail as necessary. I wanted to keep this painting fairly simple, so I concentrated on stopping when there was enough detail to make out the subject, but not so much that it overwhelmed the small format painting. I added texture to the skin of the orange here.
Here, I've added more details (the stem and highlights).
Step Seven: Sign it! I use a rubber-tipped wipe-out tool to sign my paintings when they are still wet. It removes the paint, rather than adds it on top. You can buy a similar one here.
Day One of the 30 in 30 challenge is in the books and on the blog. You can see it on Leslie Saeta's blog here (it is No. 51).
Here's what's left in my "Grab-Bag of Lessons":
Grab-bag of Lessons
- 9 Oranges
- 10 Apples
- 10 Pears
As always, please subscribe to follow along or join in. I'd love to meet you--please introduce yourself in the comments. Also, your feedback is most appreciated. Leave your questions, comments, and hate mail below. (I won't post the hate mail, ha!) Thanks for stopping by. Monique


I like this and also your step by step. Good luck with the challenge.
ReplyDeleteThank you, Sandra! Same to you.
Delete